Feeds:
Posts
Comments

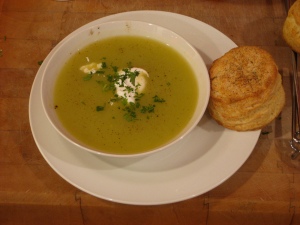
wow, potato leek soup is so cool.  it’s like, the cheapest, simplest thing ever!  and it looks, sounds, and tastes hard and fancy!  I based this on julia child’s recipe, which i basically read as equal amounts of leeks, potatoes, and water.  salt to taste.  so simple — can you even believe it? potato leek soup: leeks potatoes water salt pepper sour cream/creme fraiche (optional) parsley or chives for garnish prepare the leeks by cutting off the excess dark green end, leaving a couple inches of the more tender green intact.  leaving the roots on, cut lengthwise, then rotate 90 degrees and slice again.  the roots will hold it together while the slices open up the leaves so you can wash out the dirt caught in there.  give ’em a good bath, using your fingers to separate the layers enough that they can get clean.  chop up the leeks into smallish pieces (doesn’t need to be too neat, they’ll get blended in the end). peel the potatoes (i used yukon gold potatoes which are in season right now), and dice into medium pieces (again, it’ll get blended in the end). when you have an equal amount of leeks and potatoes, throw them in a big pot, and cover with cool water. if you add too much, you can let it evaporate off, if there’s not enough, you can always add a little more. add a decent amount of salt to the whole thing, and put it on a high flame to bring it to a boil.  once it’s rolling, turn it down to a simmer and cover.  cook until the potatoes are falling apart, which could take an hour or four, depending on how much you’ve made. when it’s all nice and soft, puree it in a blender, food processor, or, ideally, with an immersion blender.  it should have a nice consistency like porridge.  serve it hot, drop a dollop of sour cream in the middle, crack black pepper over it, and sprinkle a pinch of chopped up chives or parsley over it for a garnish. we ate it for a meal with these great biscuits jill baked.  they’re pretty simple, but we loosely followed this easy recipe from the food network.  jill modified the recipe a little by replacing the buttermilk with cream, and leaving out a little of the flour cause it felt right.  also, we skipped the last step of brushing the top with butter, they were perfect right out of the oven.  oh, and it was mixed by hand, badass style.
Ingredients

  • 4 cups all-purpose flour
  • 4 teaspoons baking powder
  • 1 teaspoon baking soda
  • 1 teaspoon salt
  • 12 tablespoons cold unsalted butter, cut into small pieces
  • 1 1/2 cups cold buttermilk
  • 1/2 cup heavy cream
  • 2 tablespoons coarsely ground black pepper
  • 4 tablespoons unsalted butter, melted

Directions

Preheat oven to 450 degrees F. Combine flour, baking powder, baking soda and salt in the bowl of a food processor. Pulse twice to distribute the ingredients evenly. Scatter the butter over the top of the flour mixture and pulse 4 or 5 times or until the mixture resembles coarse meal. Add the buttermilk and pulse until the mixture just begins to come together.

Scrape the dough onto a lightly floured counter. Pat the dough into a 10 by 12-inch rectangle about 3/4-inch thick. Use a 3-inch round cutter to make 8 biscuits then place them on the prepared baking sheet. Press together the scraps of dough, and repeat process. Place the biscuits on 2 baking sheets lined with parchment paper; brush the tops with cream and sprinkle with black pepper.

Bake the biscuits for 12 to 15 minutes or until lightly golden brown. Remove from the oven and brush the tops with melted butter.

caramel corn!

we got some popping corn on the cob from one of the farms a couple weeks ago, which i LOVE.  pop corn is a seriously under appreciated snack.  first of all, it does not have to come in a bag or be made in the microwave.  its healthier, more fun, and more delicious made on the stove top.

it doesn’t have to be complicated.  the first batch i made with a little olive oil and salt.  delish.

i was craving sweet and salty this time, so i decided to try to make caramel corn.

caramel corn:

1/2 – 1 cup popping corn
1/4 cup brown sugar
1/4 cup canola oil
salt

get a pot with a tight fitting lid.  get the oil really hot.  a good way to test it is to throw a kernel or two in the oil first, and once they pop, toss the rest in.  when you put the corn in, add the brown sugar. and cover the pot.  it’s VERY IMPORTANT not to let the contents sit still, or the sugar will burn, ruining everything and making a horrible mess.  this means you’re gonna be shaking the pot for a few minutes, which tends to be noisy, so don’t do this in an apartment late at night or your neighbors might hate you.  i used a (dry) kitchen towel to hold the lid on tight while i kept everything moving.  when the popping slows to a halt, take it off the fire, pour into a bowl, and let cool. seriously, let it cool, i burnt the crap outta my lip with a molten piece.  while it’s cooling, add a little salt, and stir it a couple times to break up the clumps.  voila, delicious caramel corn.

yummy breakfast!

vermouth brussel sprouts:

vermouth
brussel sprouts
butter or butter substitute
salt

when our friend grady was visiting she showed us a yummy way to caramelize brussel sprouts.  first, prepare the little suckers by cutting them in half, then removing a few layers of the darker, more bitter outer leaves.  i think this step might be the secret that makes the difference  between yummy brussels, and the nasty, soggy, bitter brussels i grew up avoiding.

once you’ve got them all prepped, heat a medium sized pan with butter (i used earth balance), and get it nice and hot.  place all the brussels cut side down in the hot butter, leaving a little space between them so they can brown well.  after a few minutes, check the color, and when you’ve reached a nice caramel, splash the pan with vermouth and cover immediately.  the vermouth deglazes the yummy stuff burnt on the pan, and makes a flavorful steam to finish cooking the sprouts.  they’ll be done in a minute or two. dress with a pinch of salt and serve immediately.

veggie scramble:

eggs
tomatoes
spinach
garlic

we needed something to compliment the brussels and bring cohesiveness to a brussels-for-breakfast meal.  we had nice spinach from the farmers’ market, and a couple of romanita tomatoes.  i prepared the tomatoes by removing the seeds and water (this is a good step to use when you want to use fresh tomatoes but don’t want your dish too liquidy) and slicing them widthwise.  jill heated up some earth balance (butter would be good too), sauteed the garlic, then wilted the spinach.  throw in the tomatoes right before you add the beaten eggs.  now just keep it moving till your scramble is a nice texture.  add a pinch of salt before serving.  serve hot.

we added a side of linguica to the dish to round it out, and because bitter veggies and pork are friends.

Chicken piccata is such a crowd pleaser! Adrian asks for it all the time, and they’re not the only one. When I offer to make dinner for friends or family, this one is often asked for by name. Its a very simple dish, though I might add, it’s a little pot/pan intensive. Lucky for me, Adrian is a fab sous chef and and really great at cleaning up after my whirlwind of a mess.

The sauce is simple and essential : garlic, wine, lemon. Poured over thinly sliced breaded chicken breasts nesting on bed of soft delicious pasta (homemade of course, duh), impossible to dissapoint.

We’re going to do this Ramsay style, keep up kids.

Garlic, olive oil:

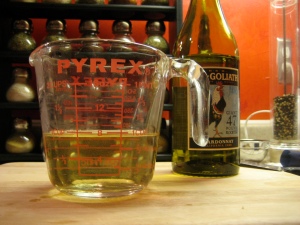
Chicken broth, wine:

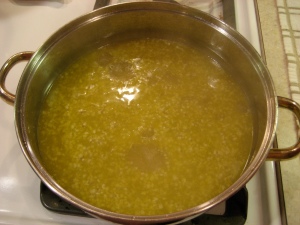
Simmer, reduce, cue smell-o-vision:

Lemon juice, simmer for another 5-10:

Coat chicken in flour, dip it in egg, toss it in bread crumbs.

Fry lightly in olive oil (they are thin, don’t go crazy):

Paper towels, warm oven (200-225):

Tell Adrian to make heavenly fluffy pasta:

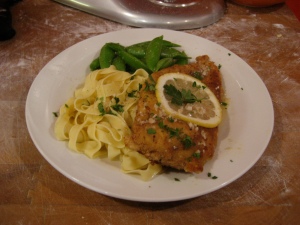
Chicken on top of pasta, sauce on top of it all. Garnish with a lemon slice and parsley. Serve with something green:


A few notes:

  • Use your own chicken broth if you’ve got it. I try to always have some in my freezer (ala mom), but lets all be honest, I’ve been slacking. You’d be surprised how much more nuanced and bright the sauce will be with a homemade chicken broth. Store bought ones can tend to be very salty and rich. A lighter broth is certainly a compliment to this sauce.
  • Honestly, when it comes to cooking wine, I buy whatever is the cheapest that I will still drink. This Rex Goliath ($4.99) is affordable and delicious!
  • After reducing the sauce add your lemon juice. Make sure to strain out those pesky seeds! I use a cheesecloth over my measuring cup. Also, you may have noticed one glaring omission in my piccata recipe. I think capers are gross. Put them in with the lemon juice if you must. (I use a little bit of the juice from the jar but keep the slimy little balls out of my meal.)
  • Use seasoned bread crumbs. I buy plain ones but season liberally with salt, pepper, garlic powder, oregano, and basil.
  • Did I mention to LIGHTLY fry your chickens? Do it. Especially if you’re going to be keeping them warm in the oven. They should be more golden than brown.

So go buy yourself a good bottle of chard, not for cooking, and savor this meal. It is aromatic, texturally diverse, and freaking tasty.

Enjoy!

cocktail portrait

we are what we drink?

(jill: absolut citron and soda with a twist/adrian: hendrick’s and soda with a cucumber)

birthday key lime pie

I made this for jill’s dad on his birthday.  he had mentioned loving key lime pie a number of times, so i thought it was perfect.  i used this great recipe from ann richardson at allrecipes.com, and i didn’t change a thing (i trust anything with three cans of sweetened condensed milk).  i even used a store bought graham cracker crust, and it came out great.  after it came out of the oven and had cooled completely, i added a layer of whipped cream, garnished the top with slices of lime, and stuck it in the freezer.  it was great the next day.  and even better the day after.

Ingredients

  • 1 (9 inch) prepared graham cracker crust
  • 3 cups sweetened condensed milk
  • 1/2 cup sour cream
  • 3/4 cup key lime juice
  • 1 tablespoon grated lime zest

Directions

  1. Preheat oven to 350 degrees F (175 degrees C).
  2. In a medium bowl, combine condensed milk, sour cream, lime juice, and lime rind. Mix well and pour into graham cracker crust.
  3. Bake in preheated oven for 5 to 8 minutes, until tiny pinhole bubbles burst on the surface of pie. DO NOT BROWN! Chill pie thoroughly before serving. Garnish with lime slices and whipped cream if desired.

TK’s new look

i mentioned my friend dan and his wonderful jams briefly in jill’s killer stuffed french toast, but i wanted to devote an entire post to jam according to daniel.  from his website:

I am a Charlottesville-based jam maker, working exclusively with local fruit in season. I learned the value of local ingredients while making jam at a local winery under managers who were looking out for the bottom line, rather than the quality of the product. I was forced to use the cheapest fruit available, all sourced through local produce companies but originating in far-off places like Florida, California, and Oregon. After the fruit had traveled for days, from the fields to my pot, in the back of a refrigerated Semi, it was woody and tasteless, and did not bring enough flavor to the jam. Once I’d started my own jam business, I was overjoyed both with the quality of fresh local fruit and with the added significance that local ingredients gave my jam. Buying local fruit from farmers means I value the fruit more, because in addition to a lower cost, I can interact with the actual human beings who grow what I buy, sell, and eat myself. I can extend this relationship between producer and consumer another step when I sell my jam, interacting directly with my customers, who eventually consume what is, in part, the “fruit” of my labors.

I got to work with dan for a short time and see his production and retail practices first hand.  it was inspiring.  he makes sure every aspect of the process is of the highest quality, from hand picking the fruit to selling dozens of jars in a couple hours to an army of loyal customers.  when i got to california and saw the amazing farmers’ markets here, i made my first batch of jam (it was fig, by the way).  when i called dan to tell him about it, he was really sweet and supportive, and gave me his blessing.

This guy not only taught me everything i know about making jam, he introduced me to jam worth loving!  I remember eating the first jams he made on his own, and having a nearly spiritual experience.  it reminded me of the feeling of eating the florida tangerines my mom would ship to me while i was suffering through the hellish winters of massachussetts.  it’s basically like biting a piece of concentrated sunshine distilled from a summer’s worth of beautiful days.  the smartest and luckiest people in charlottesville, virginia are the ones that go religiously to the farmers’ market to get their jam fix and bat their eyes at handsome dan.

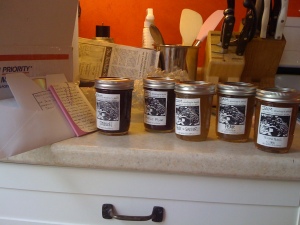
he shipped me a beautiful box, complete with some new flavors.  thanks daniel!

(flavors: damson, double plum, pear ginger, pear lavender, yellow peach + lime)

benedict? shmenedict!

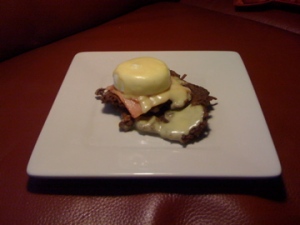
jill’s done it again.

this dish is genius.  it’s not exactly kosher, but i think her bubbe would love it.  what a mentsh this girl is for making such good nosh for me.  i nearly plotzed when i tasted it.  after eating this, all you can think is, “benedict shmenedict!”

jill's benedict shmenedict

it all happened when we found a secret stash of latkes in the depths of our freezer, and jill had an inspiration: latkes, smoked salmon, poached eggs, hollandaise.  bam.  incredible.

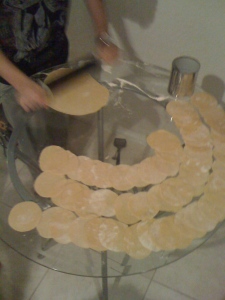
our friend jack came to visit us, and so of course our way of entertaining him was to hang out in the kitchen, have cocktails, and cook  a good meal!  fresh pasta tortellini is a really fun meal to make with a bunch of people, as i proved true at my friend bex’ place in florida, where we had 5 or 6 people who all wanted to help.  i wish i had remembered to photograph the meal, because jacob’s puttanesca sauce was killer, and we had a great salad from greens he grew in his garden.  actually, i got one shot of evan and josh rolling and cutting out the massive amount of dough we made that night.

This is actually a perfect example of both how you want your cut dough to look before you assemble your torte’s, and how, with a rolling pin and the can your tomatoes came in, you can make just as good pasta as with a mechanical roller and a cookie cutter.

so you start with your rolled out fresh pasta dough.  using a standard, round, 3.5″ cookie cutter, make as many circles as you can get out of your dough.  you can roll the scraps back out once or twice, but expect to throw a little away.

hopefully you’ve already prepared your filling.  for this dinner we were making with jack, we used eggplant from our farmers’ market, and ricotta cheese.  we sliced and salted the eggplant and let it drain for a couple hours.  then we dried them, tossed them in olive oil and some salt and pepper and oregano, and baked at 350 degrees for 40 minutes or so.  after they had cooked, we diced them, then mixed them with the cheese.

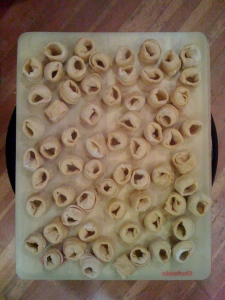
arrange a little work station with a bowl of your filling, a bowl of beaten egg, and your pasta disks.  this is the part you can get all your friends to come help with.  to assemble the torte’s, hold a disk in the palm of your hand.  spoon a SMALL amount of filling into the center (a quarter-teaspoon, seriously).  on half of the circle, brush a strip along the edge with egg.  now fold the disk in half, the egg is your glue.  use your thumb and forefinger to nip out any air around the filling, and along the edges to seal your pasta.  now fold the edge back around the stuffed part like a collar, brush a bit of egg on one corner, wrap around your pinky (collar out), and press the corners together to finish.  voila, the cutest tortellini ever!  repeat with the rest of your dough.

that’s probably a bit confusing, so here’s a video of gordon ramsay doing it.  jump to the 3:25 mark to watch him teach mrs. corbett how to assemble tortellini.

these still cook fast, but they take longer than linguini.  boil in salted water for 8-15 minutes.  they’ll be ready when the pasta is no longer stiff at the joining point.  try it to make sure, cause it’s a bummer when they’re under or overcooked.

we dressed our torte’s with jill’s tomato sauce.  it’s very simple and very delicious.  roma tomatoes, garlic, onion, basil, and spices.  i always splurge on imported italian roma tomatoes, whole and peeled, in tomato puree. i mean, it’s 96% of the sauce, so spend the extra buck and skip the generic brand.

saute the garlic in olive oil, add the tomatoes, stir occasionally over a medium heat until the sauce reduces slightly and the tomatoes become soft and begin to fall apart (i usually help them along at this point by mashing them with my wooden spoon). throw in the basil and turn it down to a simmer. let it cook in a little to infuse the sauce with the basil’s fragrance, but not so long as you start cooking it off. oregano, salt and pepper to taste.
and, as always, something green: a salad on the side.